

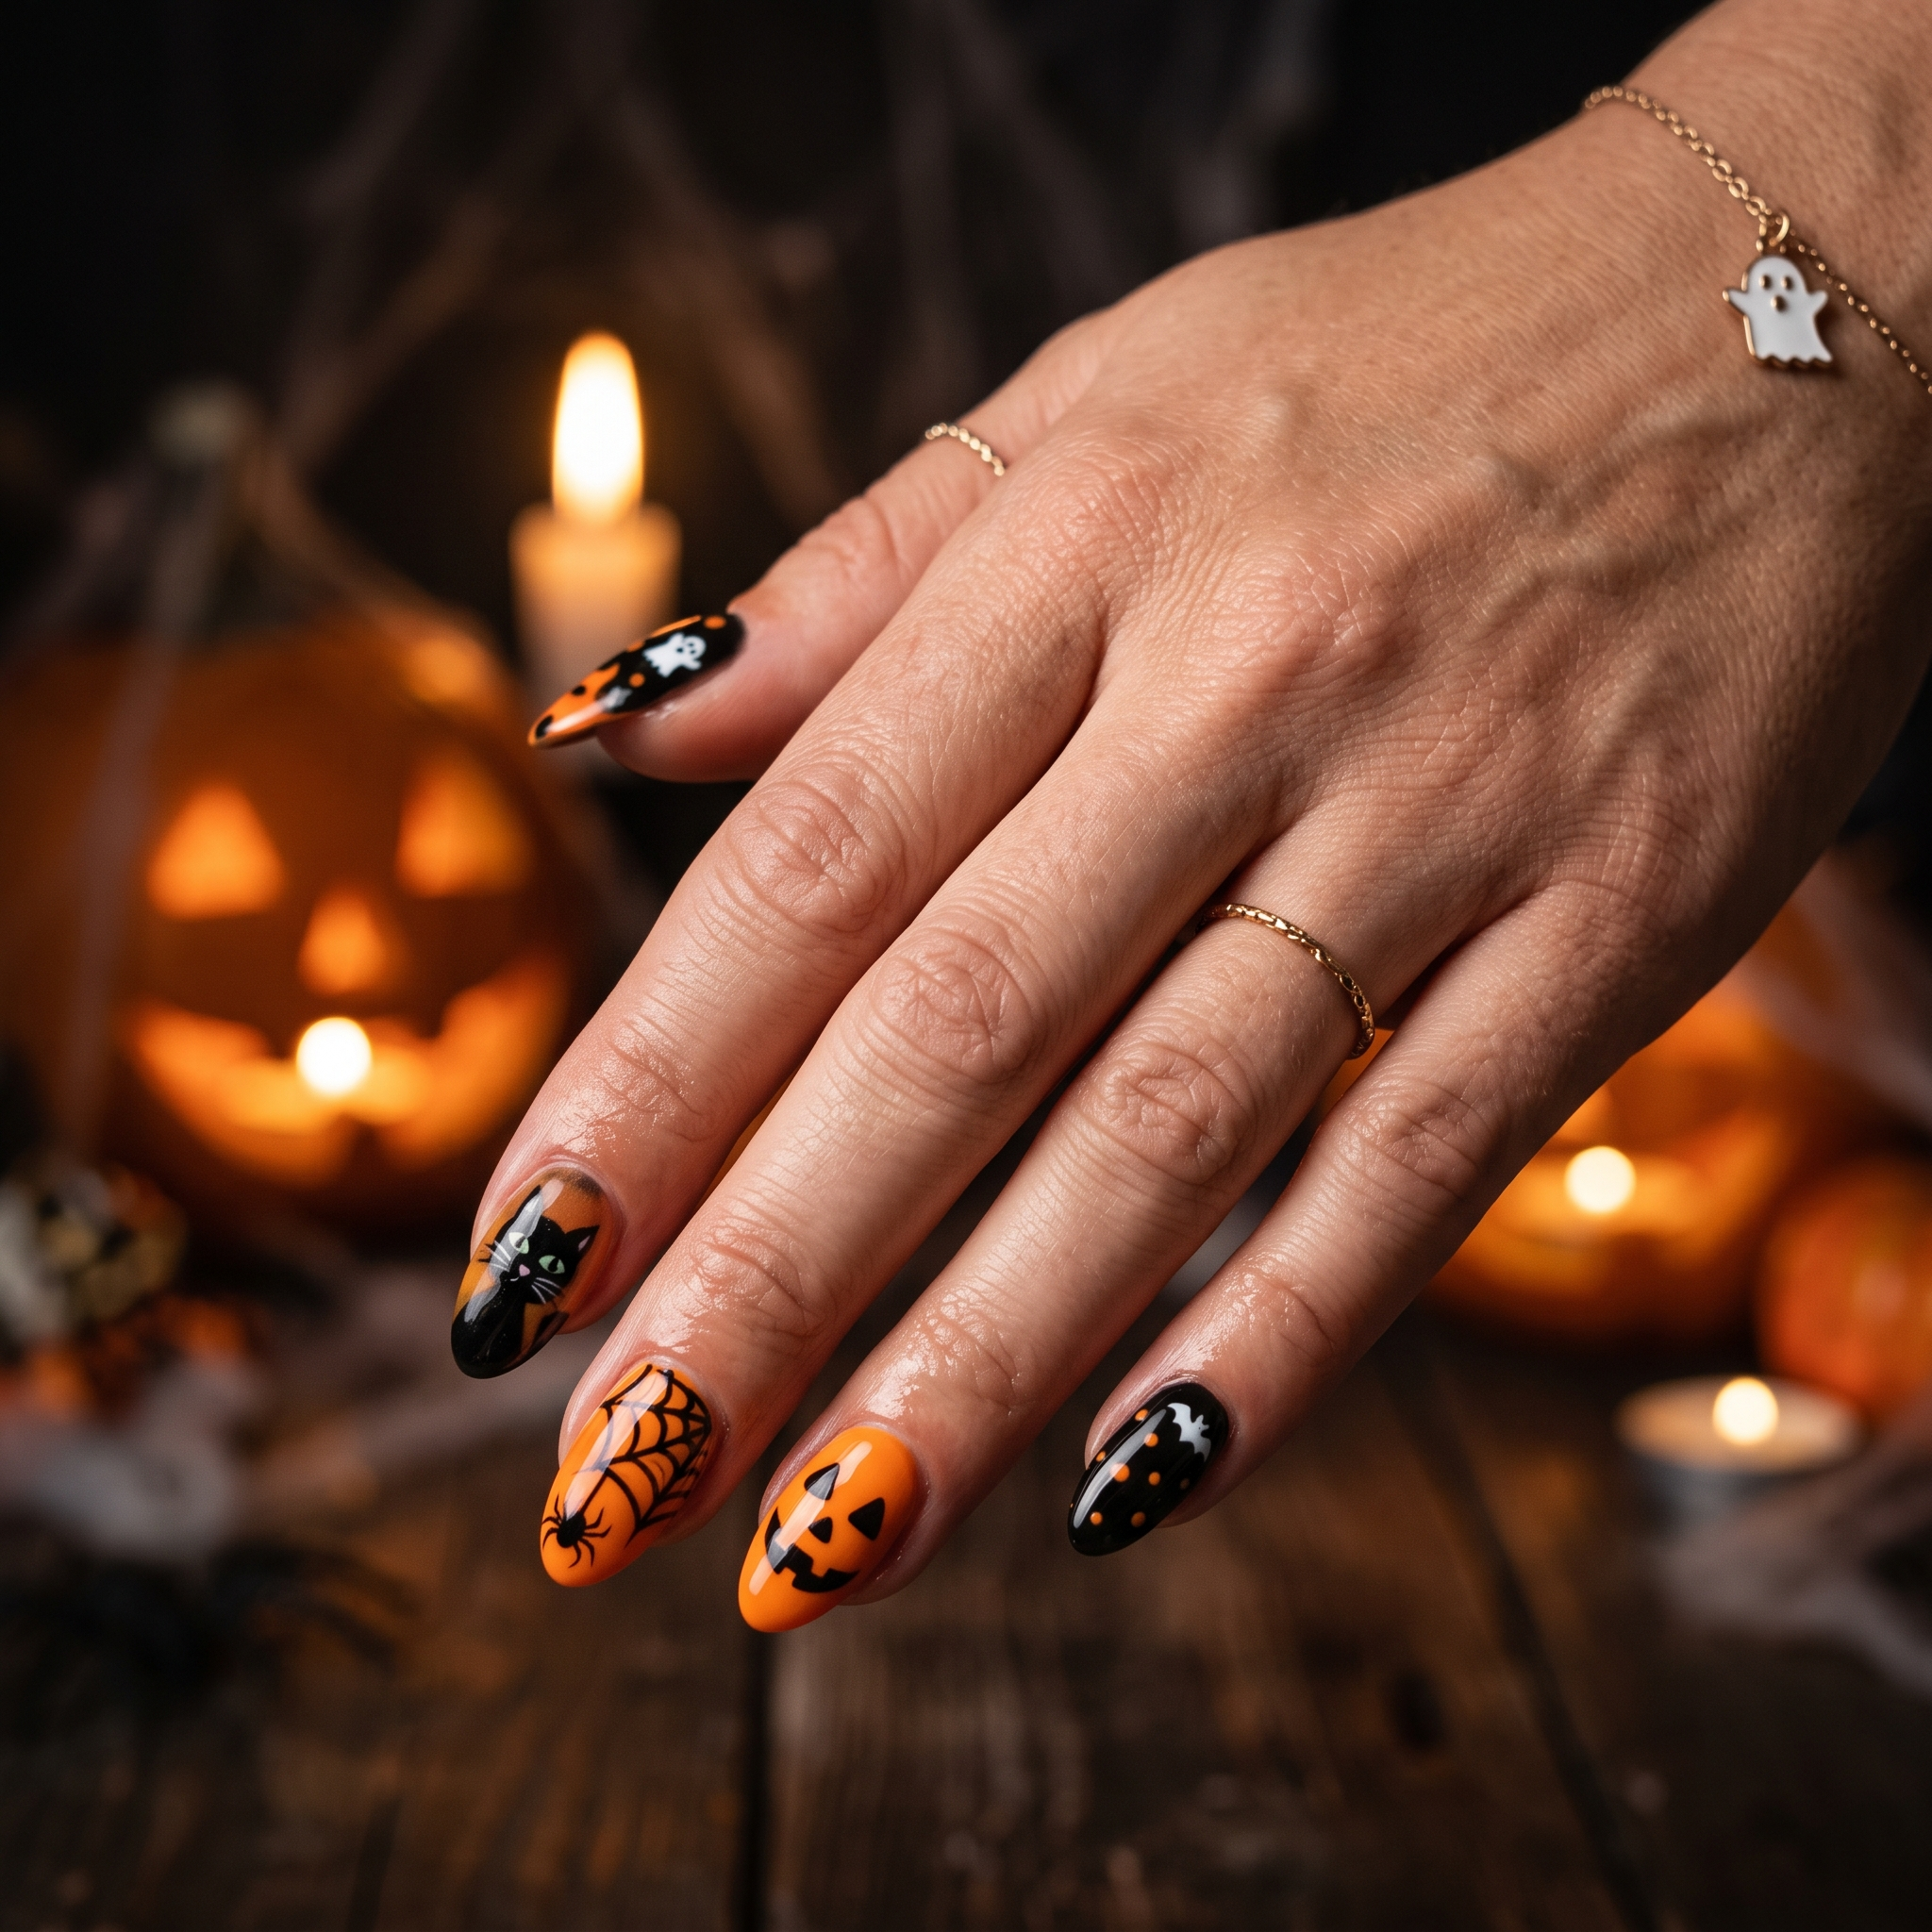
Halloween is almost here, and you don’t need a salon appointment to have festive nails this year. Every idea on this list is genuinely easy Halloween nails for beginners no advanced skills, no expensive kit, and no wasted polish. Scroll through, pick a few favorites, and try a new design whenever you’re ready.
1. Black Cat Nail Art for Beginners
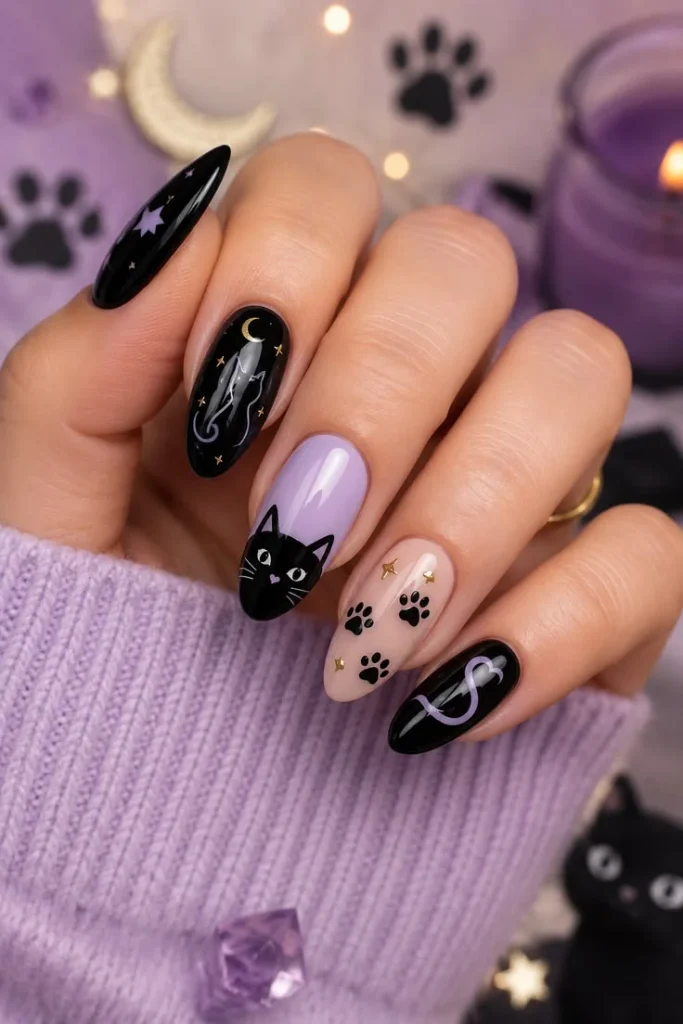
Start with a nude or white base, then use a thin brush to paint one black triangle-eared silhouette. Two tiny white dots for eyes finish the look and give it a bit of personality. This is a great first project because it only asks for one clean shape, not a full scene. Once you’re comfortable with the outline, you can add whiskers for extra detail.
If your triangle shape comes out uneven, don’t worry a slightly wonky ear actually reads as more hand-drawn and charming than a perfectly geometric one. A striping brush (the thin, pointed kind sold in most beauty aisles) makes the whiskers much easier than a regular polish brush. This design also holds up well over several days since it’s a simple silhouette with no fine detail to chip or smudge, making it a solid pick if you want your Halloween mani to last the whole week leading up to the holiday.
Love this look? Pin it now so you can find it when you’re ready to recreate it.
35+ August Nail Ideas 2026 You’ll Want to Copy: Trending Colors, Designs & Shapes
2. How to Do Skeleton Nails Step by Step
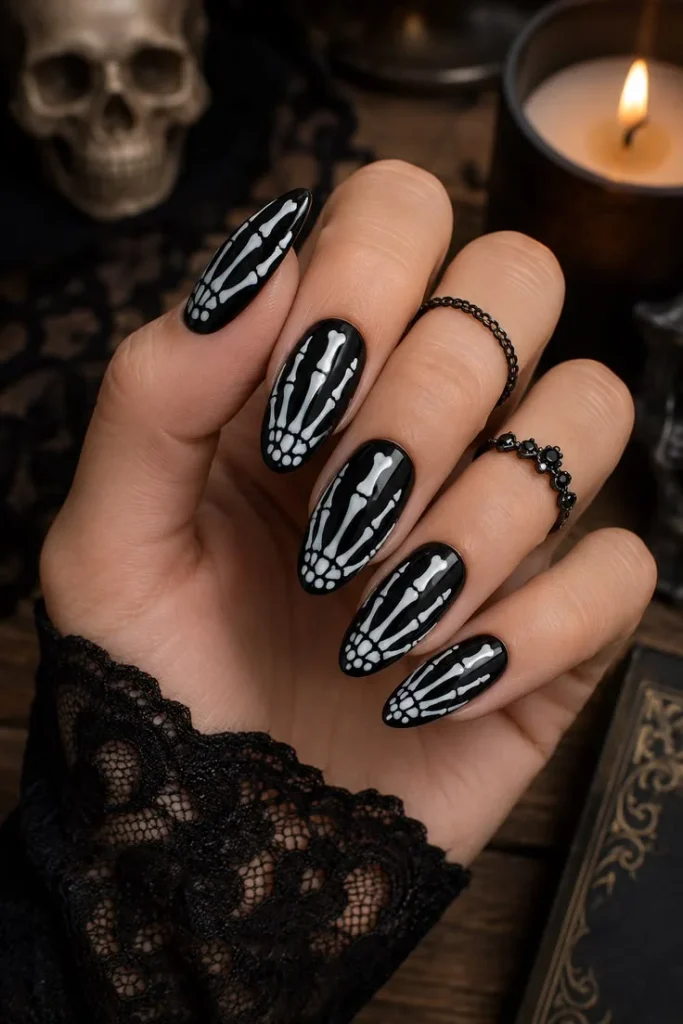
Paint a solid black base first and let it dry completely before adding any detail. Add a few loose white lines across each nail to suggest finger bones imperfect lines actually look more realistic than perfectly straight ones. This design takes under ten minutes per hand and needs zero shading or blending. It’s a dramatic, high-impact look for very little effort.
A common beginner mistake here is trying to paint the “bones” too symmetrically, which can end up looking more like a bar code than a skeleton hand. Instead, vary the length and spacing of each line slightly, and let a few lines curve gently rather than staying perfectly straight. If your white polish looks streaky against the black base, two thin coats will always look cleaner than one thick one thick white polish tends to pull and drag on a dark base coat.
Save this pin now — you’ll want the tutorial when Halloween gets closer.
3. Cartoon Skull Nail Design
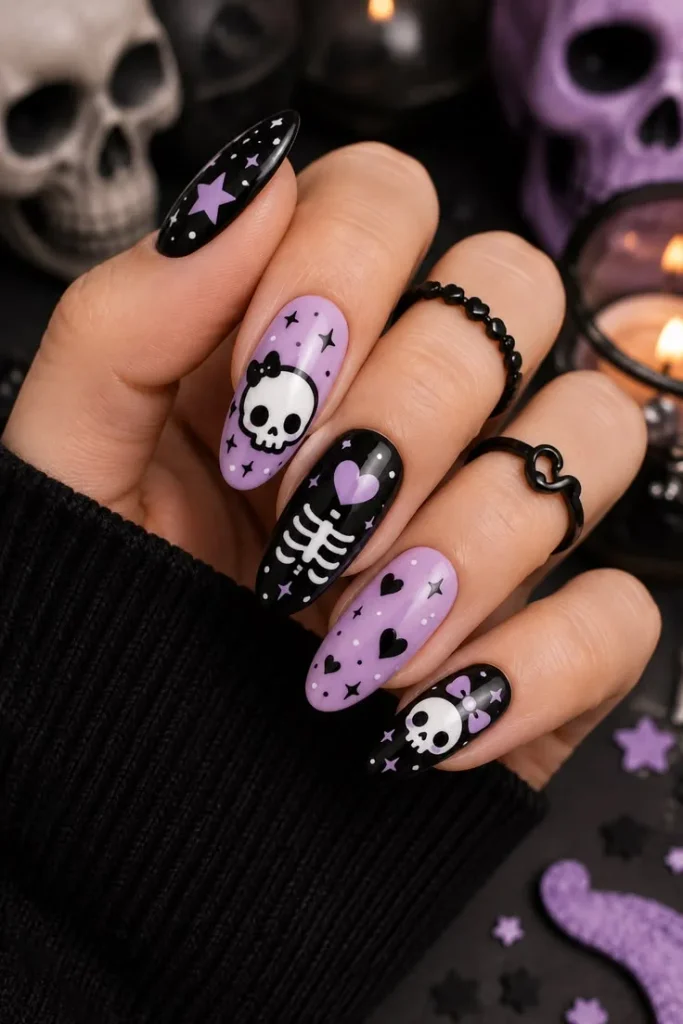
Keep this one to a single accent nail rather than a full hand of skulls. A round dotting tool creates the eye sockets without any freehand precision. Leave the rest of your nails plain black or white so the skull has room to stand out. It’s a tiny detail that reads as intentional rather than rushed.
If you don’t own a dotting tool, the rounded end of a bobby pin works just as well for this size of detail. Keep the eye sockets slightly larger than you think they should be small dots tend to disappear once the polish dries and the nail catches light. This design pairs particularly well with a matte top coat on the accent nail specifically, while keeping the surrounding nails glossy, which creates a subtle textural contrast that makes the skull pop even more.
Save this for a low-effort Halloween mani that still looks put together.
4. Simple Spiderweb Nail Art
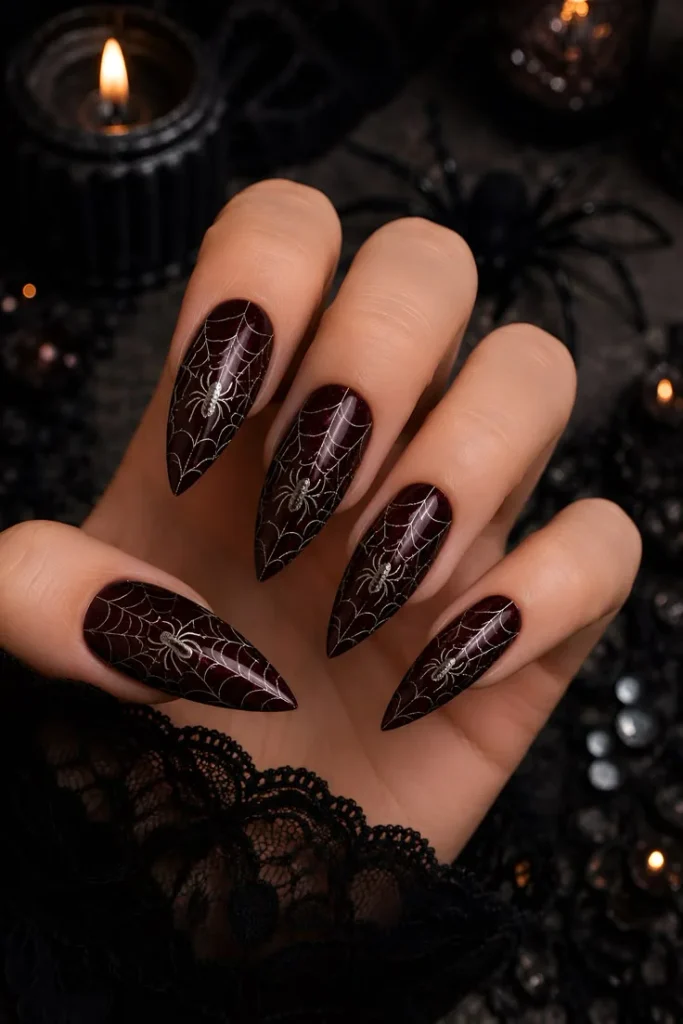
Draw a few crossing lines first with a striping brush, then connect them with small curved arcs to form the web. This is a classic Halloween look that works beautifully on both short and long nails. Because the lines don’t need to be perfectly symmetrical, small wobbles just add to the handmade charm. It pairs well with a single spider accent if you want to take it further.
Start from the center of the nail and work outward for the straight lines this naturally creates the radiating pattern a web needs without much planning. Thin your white polish slightly with a drop of polish thinner if it’s dragging instead of gliding, since thick polish makes fine lines much harder to control. This design also works well over any base color, not just black, so feel free to try it over a deep purple or burgundy if you want a moodier version of the classic look.
Bookmark this one — it’s a repeat favorite for a reason.
5. Cute Pumpkin Nail Design
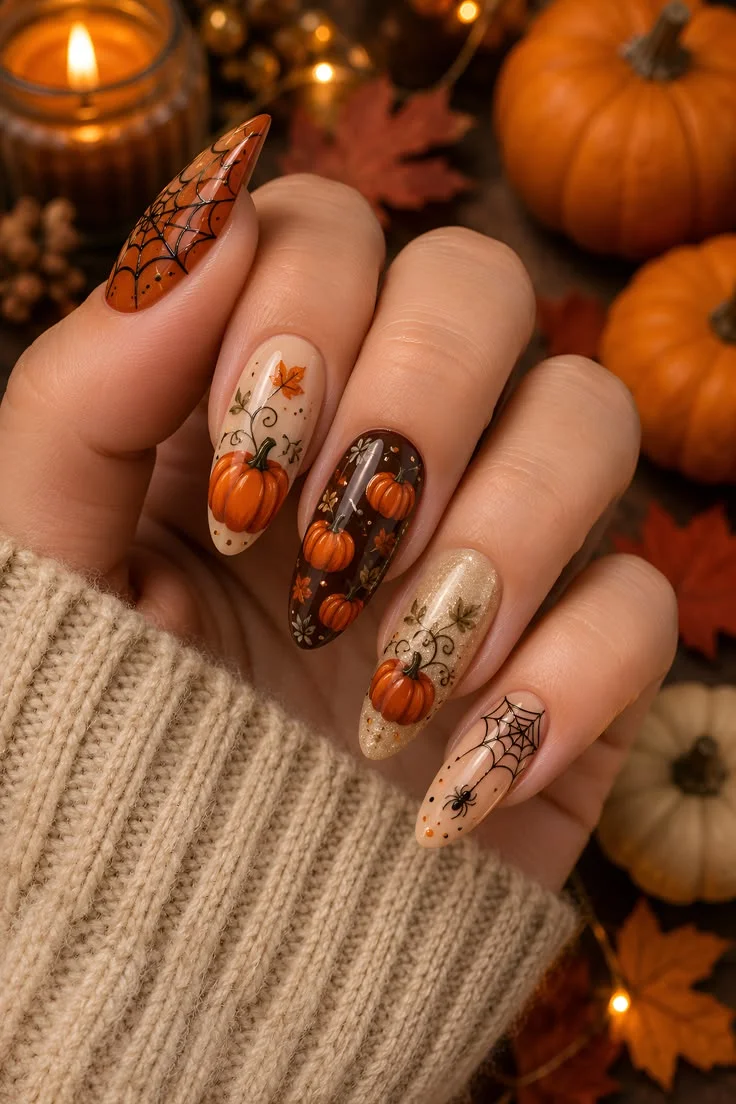
Apply a solid orange base and let it dry fully before adding detail. Add a few black curved lines to suggest pumpkin ridges, then finish with a small brown stem at the top. It’s a warm, cozy option that reads “fall” as much as “Halloween,” so it works well into early November too. Try it as a full set or just one accent nail.
For the ridges, curve your lines slightly inward toward the center of the nail rather than keeping them straight this is what actually sells the rounded pumpkin shape. A toothpick works well for the tiny stem detail if a regular brush feels too wide for such a small shape. Because this design leans more autumnal than spooky, it’s a great option if you want something that transitions smoothly from Halloween straight into Thanksgiving without needing a full redo.
Pin this for later if pumpkin season is your whole personality.
6. Candy Corn Nail Art
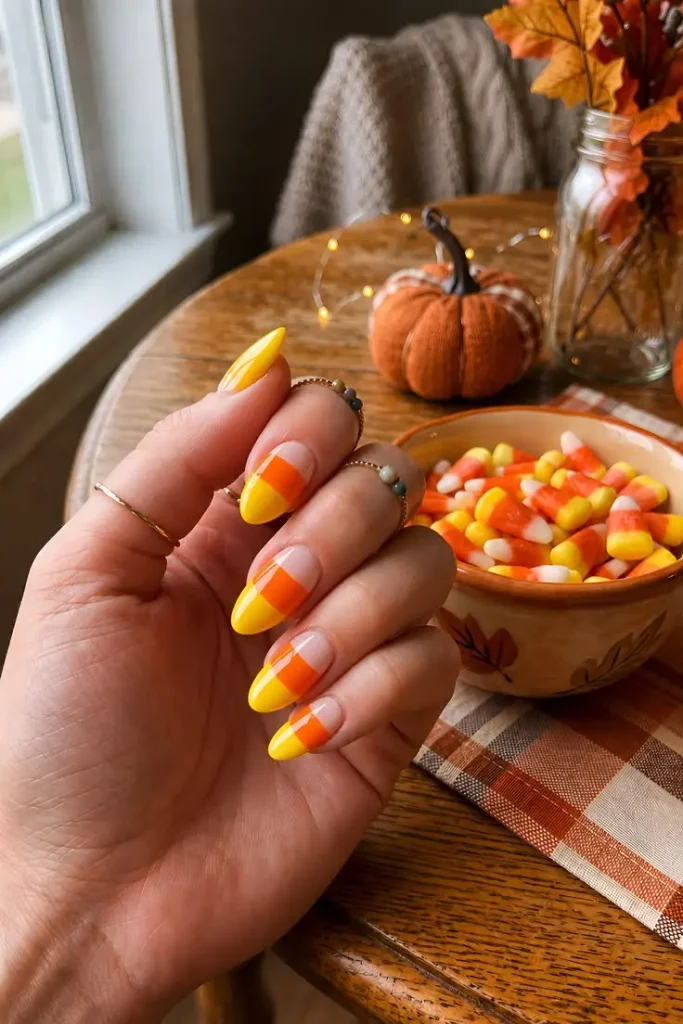
Paint yellow at the base of the nail, orange through the middle, and white at the tip. Because it’s just straight bands of color, there’s no blending or shading required at all — just steady, even lines. Let each color dry slightly before adding the next one to keep the edges crisp. It’s a nostalgic, candy-inspired look that photographs well too.
Use painter’s tape or nail vinyl strips if you want perfectly crisp lines between the three colors — this removes almost all of the freehand guesswork. If you’re going fully freehand, resting your painting hand against a table edge for stability makes a bigger difference than most people expect. This design tends to last well because each band of color is fully opaque and doesn’t rely on fine detail work that’s prone to smudging.
Save this for a sweet, retro-style mani.
7. Two-Tone Black and White Nail Design
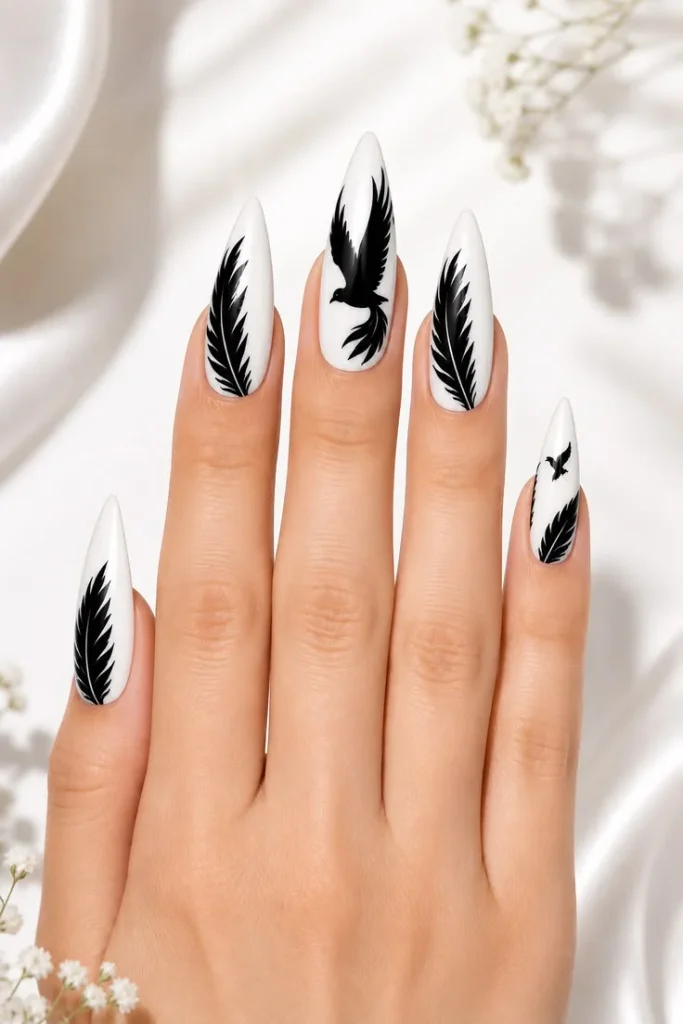
Alternate solid black and solid white across your nails for instant contrast. Add one accent nail with thin criss-cross lines for a bit of texture and interest. Working with only two colors keeps this look fast and genuinely foolproof, even on your first try. It also transitions easily from Halloween straight into a chic everyday manicure.
For the criss-cross accent nail, draw all the lines going in one direction first, let them dry for a minute, then add the crossing lines on top trying to do both directions while the polish is still wet will smear the pattern. This design is one of the most versatile on the list since dropping the criss-cross detail entirely still leaves you with a clean, wearable two-tone look for work or everyday errands. It’s also a great option if you’re pressed for time before a party, since each color only needs one coat to look fully opaque.
Try this combo if you want something graphic but still simple.
8. Ombre Halloween Nails (Black to Orange)
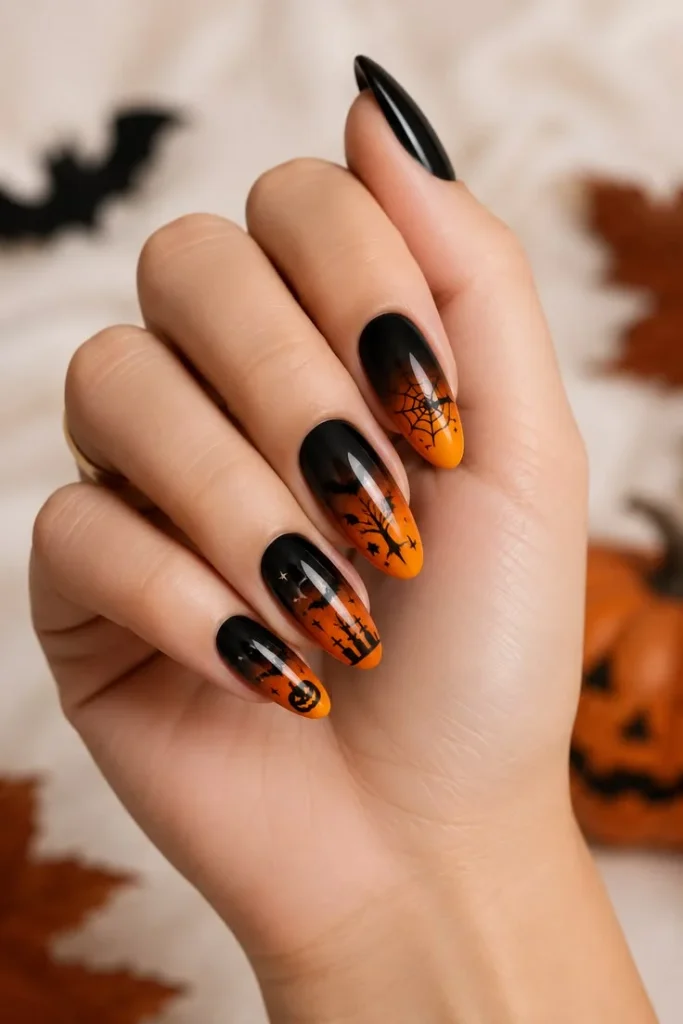
Dab both colors near the middle of the nail using a makeup sponge, then blend gently where they meet before the polish dries. This sponge technique does the hard work for you, so there’s no need for precise brush control. A little patchiness on your first attempt is normal a top coat smooths a lot of that out. Once you get the hang of it, this technique works for endless color combos.
Apply a thin layer of the two colors directly onto the sponge rather than dabbing straight from the bottle, since sponge-applied polish blends more evenly and dries less clumpy. Work quickly once you start dabbing onto the nail, since the sponge technique relies on the polish still being workable if it’s already tacky, the colors won’t merge smoothly. Clean the sponge with a bit of nail polish remover between colors if you’re doing multiple nails, otherwise leftover pigment will muddy your next application.
Pin this gradient trick — it works for other color combos too.
9. Easy Ghost Nail Art
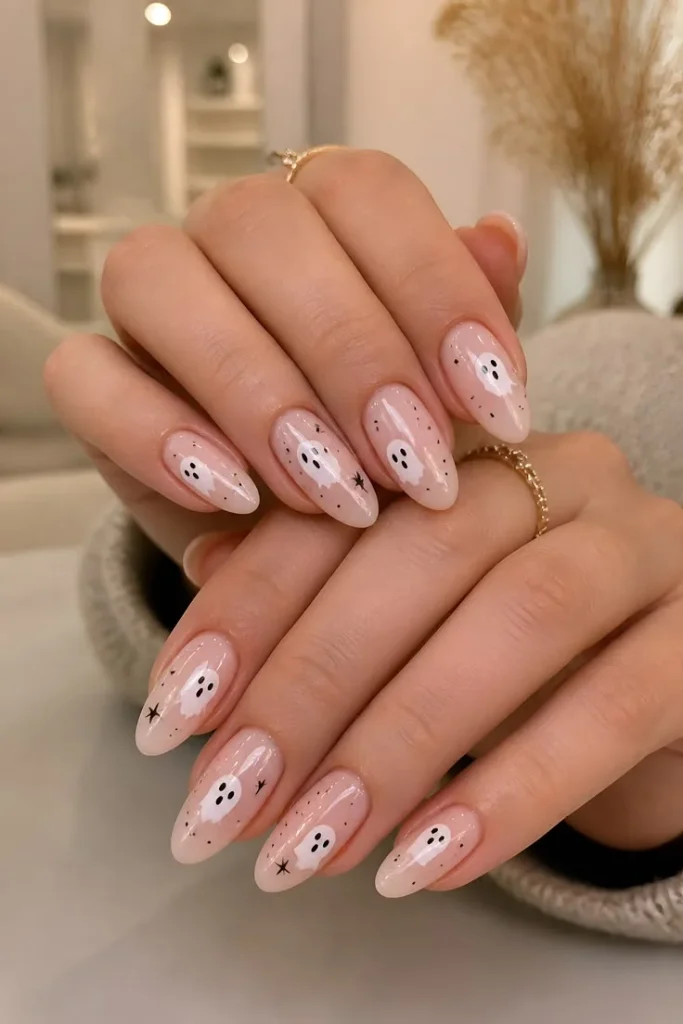
Paint one rounded white shape with a slightly wavy bottom edge to suggest a floating ghost. Add two small black dots for eyes and you’re done in just a couple of minutes. It’s spooky-cute rather than scary, which makes it easy to wear anywhere, including work or school. Try adding a small “boo” in tiny script on a second nail if you want to build it out.
Paint the ghost shape over a colored base (navy or dark purple work especially well) rather than leaving the nail base bare, since the contrast makes the white shape read much more clearly. Keep the wavy bottom edge loose and irregular three or four soft bumps is enough, and trying to make each bump identical usually makes the shape look stiffer, not neater. This is one of the fastest designs on the whole list, so it’s a good option if you’re doing Halloween nails on the morning of a party with limited time.
Love this look? Pin it now so you can find it when you’re ready to recreate it.
10. Witch Hat Nail Design
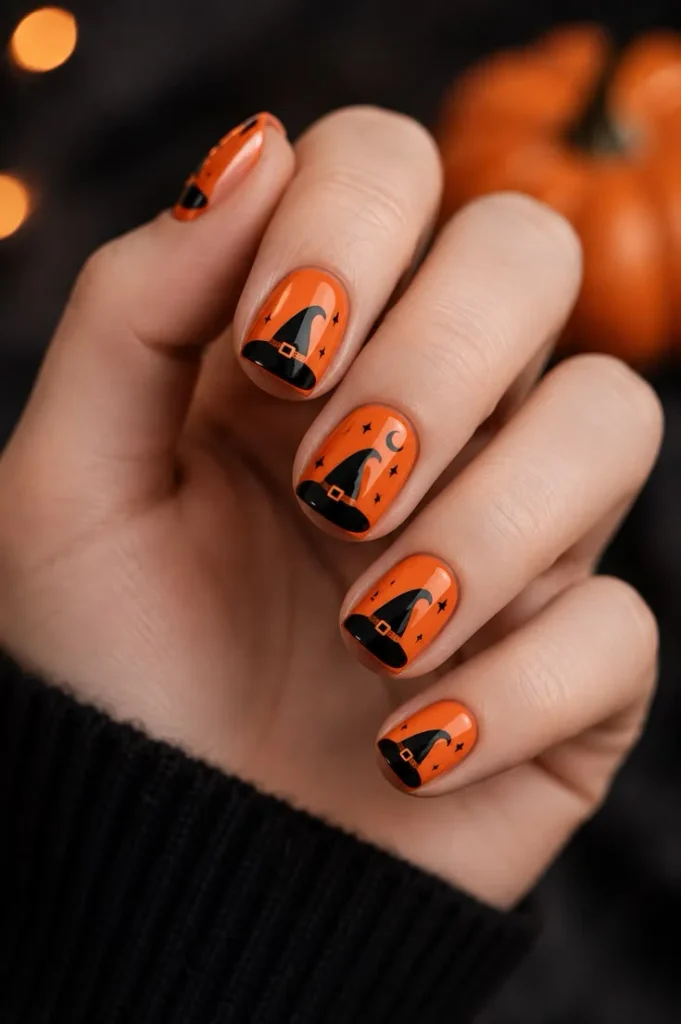
Paint a simple black triangle with a curved brim underneath for the hat shape. Keep the rest of your nails a solid purple or green base so the hat has room to stand out on its own. A tiny orange buckle detail on the brim adds a nice finishing touch if you want to go further. This one reads witchy without needing an actual face or figure.
Angle the triangle slightly to one side rather than painting it perfectly centered and upright a bit of tilt makes the hat look more dynamic and less like a static shape. The curved brim is the trickiest part for beginners, so if a straight brim is easier for your skill level, that’s a completely acceptable simplification that still reads clearly as a hat. This design pairs especially well with a matching green manicure inspired by classic witch aesthetics, tying the whole look together thematically.
Pin this for a witchy accent nail that takes minutes.
11. Minimalist Bat Nail Art
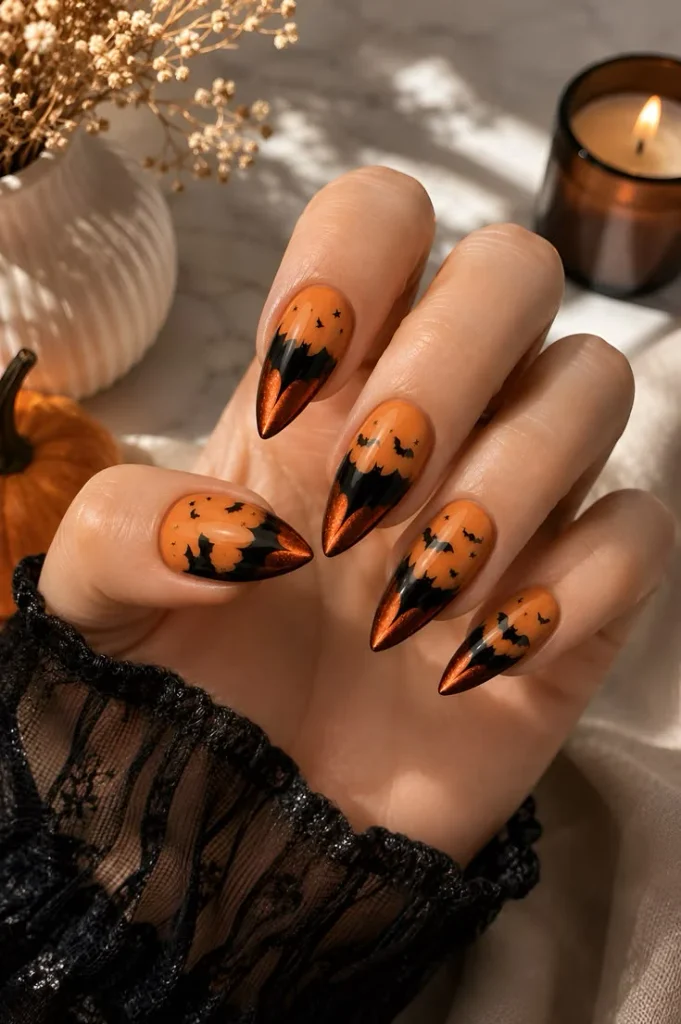
Paint two connected triangle shapes for the wings, then a small rounded body in the middle to tie them together. There’s no shading involved, and the whole design can be done freehand in under a minute per nail. It pairs well with a plain black or deep purple base on the rest of your nails. A tiny dot of white for the eye adds character if you like extra detail.
If freehand triangles feel intimidating, sketch the wing shape lightly with a toothpick dipped in polish first, then fill it in once you’re happy with the outline. Keeping the wings slightly asymmetrical (one a touch larger than the other) actually looks more natural than forcing perfect symmetry, since real bat wings in flight rarely look identical. This design also works beautifully scaled up as a single statement nail with the bat filling most of the nail bed, rather than a smaller accent detail.
25+ August Nails: End of Summer Nail Ideas You’ll Love
Save this if you want spooky without going overboard.
12. Gothic Vampire Nail Design
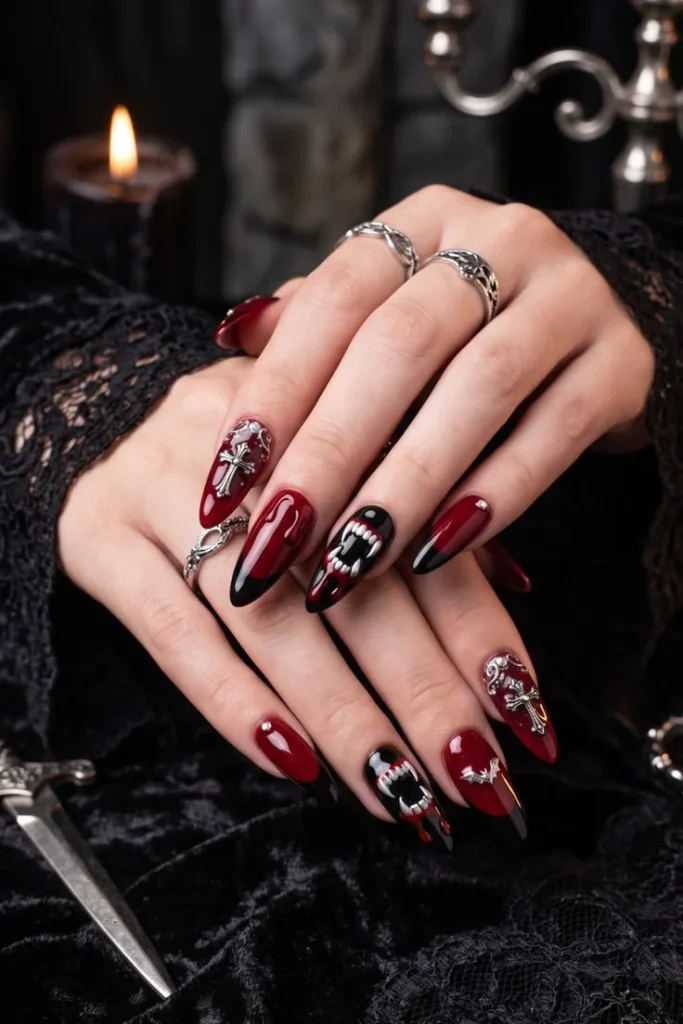
Start with a rich red or black base coat and let it fully cure or dry. Paint two tiny white fang shapes near the tip of one accent nail using a thin brush for control. It’s a small detail that instantly reads as gothic glam without needing a full illustration. Pair it with dark red lips for a matching Halloween costume moment.
Keep the fang shapes short and slightly rounded at the tip rather than long and pointed overly sharp fangs tend to look cartoonish instead of gothic-elegant. A deep, almost black-red polish (sometimes labeled “vampy red” or “oxblood”) gives this look more sophistication than a bright cherry red would. This design is a great option if you’re attending a Halloween event with a costume, since it complements almost any dark, dramatic makeup look without competing for attention.
13. Bloody Drip Nail Design
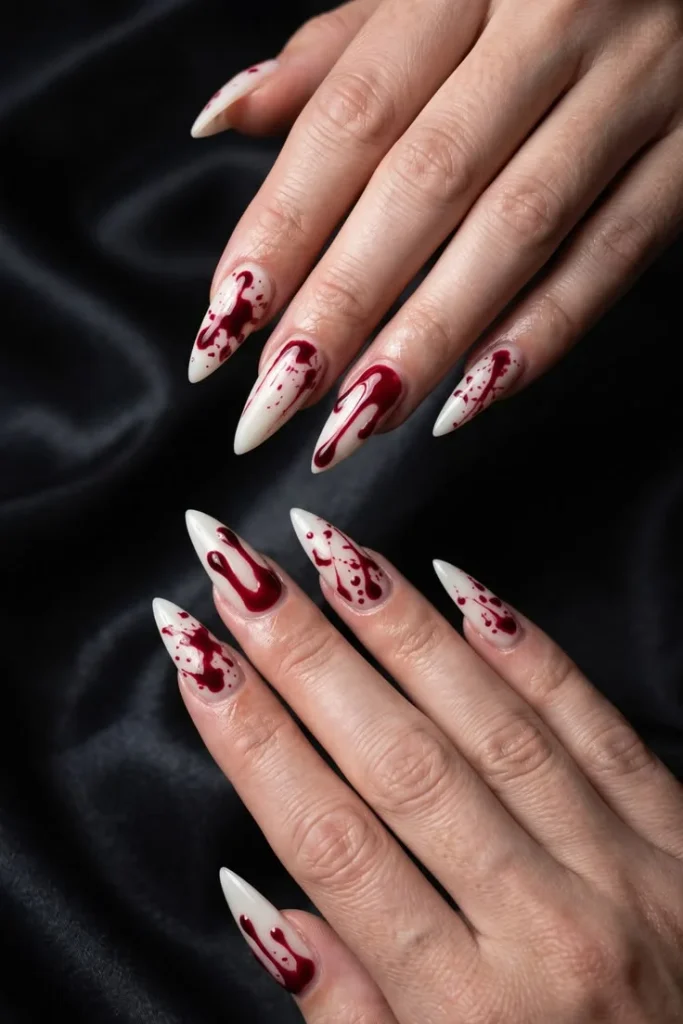
Start with a white or nude base and let it dry completely first. Use a thin brush to drag small red lines downward from the tip and let gravity help create a natural drip shape. Vary the length of each drip slightly so the effect looks less uniform and more realistic. It’s an easy way to bring horror-movie energy to your hands without any advanced technique.
Load your brush with slightly more polish than usual for this design a fuller brush naturally creates the teardrop shape at the end of each drip as gravity pulls it downward. Working on one nail at a time and letting each drip set for thirty seconds before moving to the next nail prevents accidental smudging when your hand brushes against wet polish. If you want an even more dramatic 3D effect, a small drop of clear gel or striping gel on top of each drip tip adds dimension once cured.
Save this if classic slasher nails are your thing.
14. Short Nail Design for Halloween
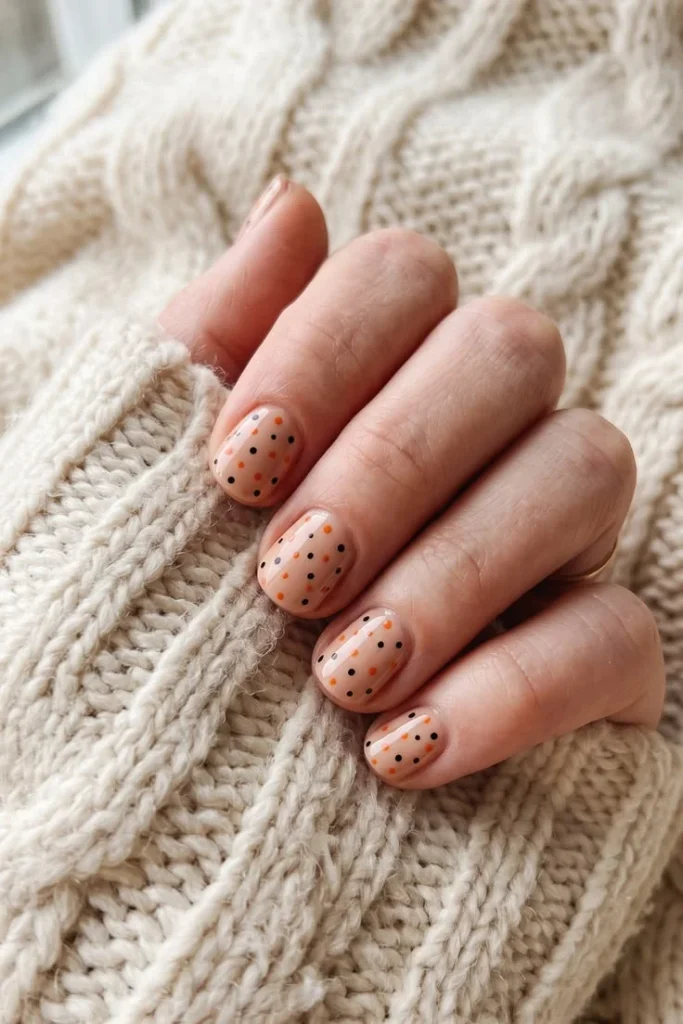
A nude base keeps shorter nail beds looking clean and elongated, so start there before adding any detail. Scatter a few small orange and black dots randomly across each nail using a dotting tool. Varying the size of the dots slightly makes the pattern feel more natural rather than mechanical. It’s proof that short nails can still feel just as festive as long ones.
Space the dots unevenly and avoid lining them up in neat rows, since a scattered, organic placement is what makes this design feel playful rather than stiff. If you don’t have a dotting tool set with multiple sizes, the tip of a bobby pin and a toothpick together give you two different dot sizes to work with. This design is particularly forgiving for short nails specifically because there’s no need to fit a full illustration onto a smaller canvas the dots simply scale down naturally.
Pin this if you keep your nails practical but still want Halloween flair.
15. Minimal Halloween Nails with Mini Pumpkin Accent
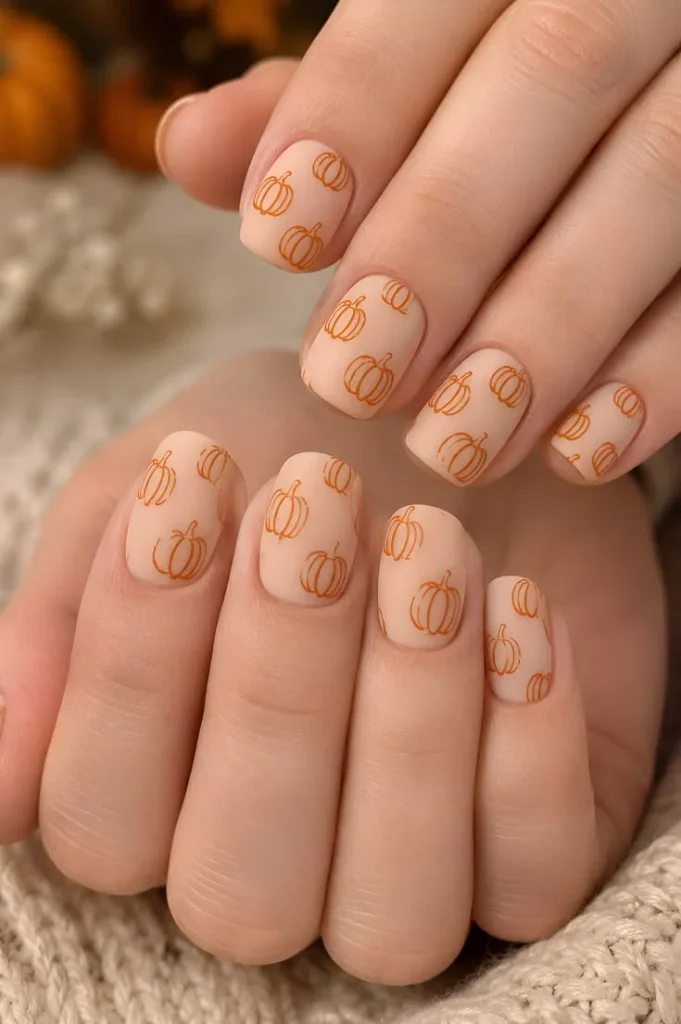
Keep every nail a soft neutral shade except one, which becomes your accent nail. On that single nail, paint one small pumpkin with a tiny stem. This minimal approach works especially well if you prefer subtle, everyday-wearable nail art over a full themed set. It’s also one of the fastest looks on this list to touch up if a nail chips.
Choose a warm beige or dusty rose neutral rather than a stark white base, since warmer neutrals complement the orange pumpkin accent more cohesively than a cooler-toned nude would. Because only one nail carries any design, this is an ideal option for anyone new to nail art who wants to practice a single small shape without committing to a full set. If that one accent nail chips before the rest, you can redo just that single nail rather than repainting your whole manicure.
Save this for a Halloween look you could wear to work.
16. Glossy Halloween Gel Nail Idea
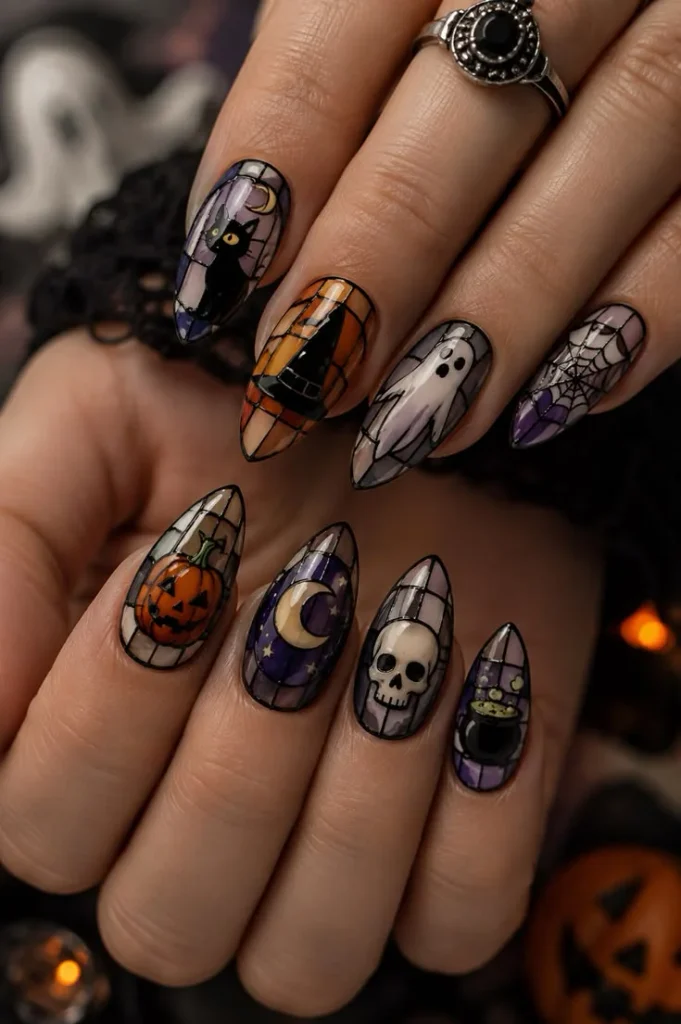
If you already own an at-home gel kit, apply a glossy black gel base across all nails and cure as directed. Add one or two small silver or gold decals for detail once the base is fully set. The glossy cured finish alone gives a salon-quality result with very little extra effort. This is a good option if you want your Halloween mani to last through the whole month.
Wipe each layer with the tacky-residue cleanser that comes with most gel kits before adding decals, since decals won’t adhere properly to the sticky film gel polish leaves after curing. Press decals on gently with tweezers rather than fingertips to avoid smudging or warping them before they’re sealed under a top coat. Because gel manicures typically last two to three weeks without chipping, this is the best option on this list if you want your Halloween nails to survive multiple parties and events without a repaint.
30+ August Birth Flower Tattoo Ideas You’ll Want to Copy
Pin this for your next gel manicure night.
17. Halloween French Tip Nails
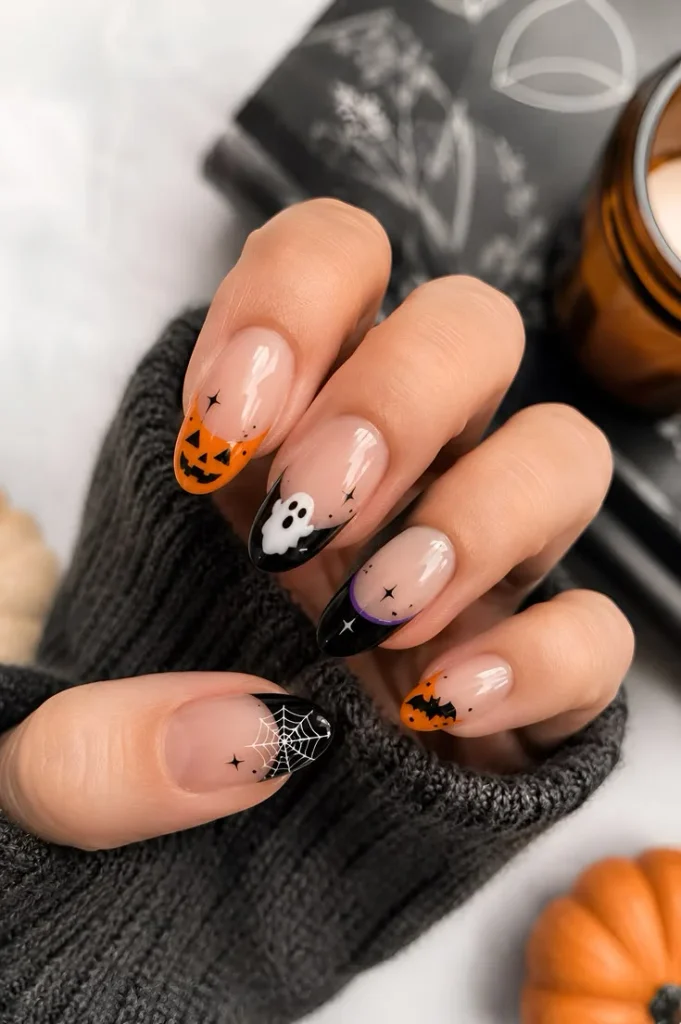
Paint your usual nude base coat as you normally would for a French manicure. Swap the classic white tip for orange, black, or deep purple instead, using a thin brush or French tip guide sticker. It’s a subtle seasonal twist on a style you likely already know how to do. This one transitions easily into everyday wear once Halloween has passed.
French tip guide stickers (sold cheaply at most beauty supply stores) make a much bigger difference here than most people expect, especially if your hand isn’t fully steady with a brush. If you’re going freehand, painting the tip in one confident stroke rather than several small strokes gives a cleaner curved line. This design is a great middle ground for anyone who wants Halloween nails but works in an office environment where a full spooky theme might not be appropriate.
Save this if you love a classic French but want it Halloween-ready.
18. Halloween Accent Nail with Spiderweb Detail
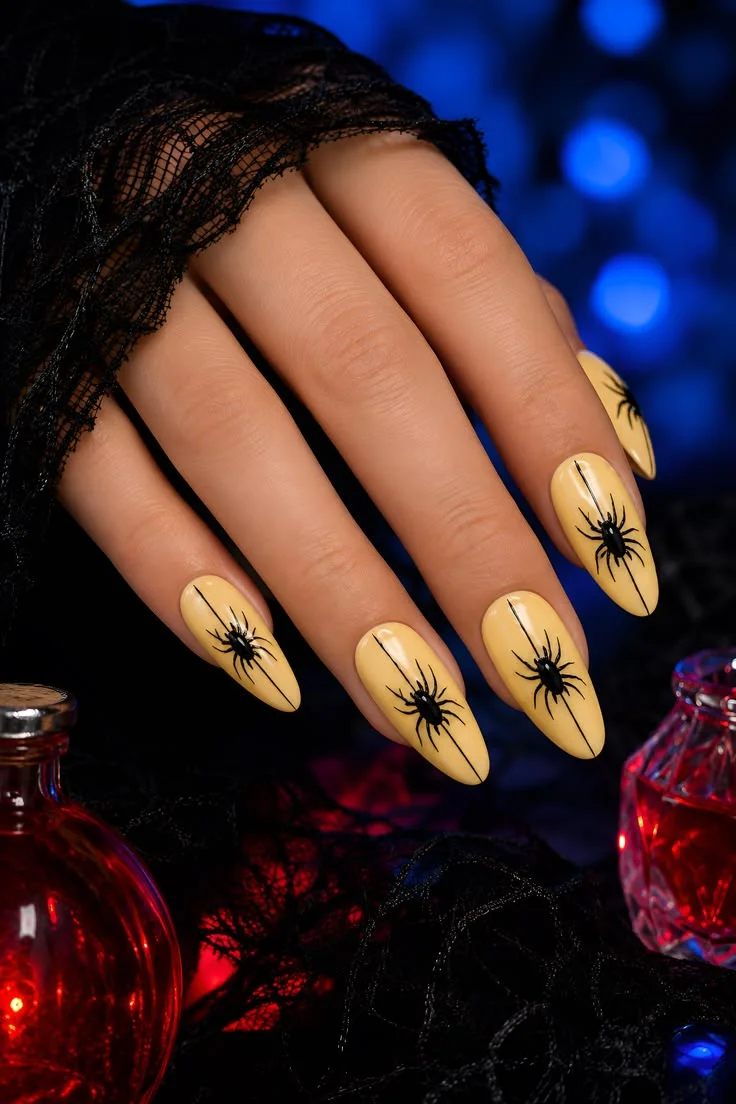
Keep most nails a plain matte black base for contrast. On just one glossy accent nail, paint a fine white web pattern using a striping brush. This toned-down version keeps things wearable for everyday errands, not just parties or costumes. The mix of matte and glossy finishes also adds visual interest without extra painting.
Apply your matte top coat to every nail except the accent one, then finish the accent nail with a regular glossy top coat over the web design the finish contrast alone does a lot of visual work here. Matte top coats also tend to hide small imperfections better than glossy ones, which is helpful if you’re still building confidence with a striping brush. This design photographs particularly well because the light reflects differently off the matte and glossy sections, giving it more visual depth than a single-finish manicure.
Pin this for an office-friendly Halloween mani.
19. Chrome Halloween Nails for Beginners
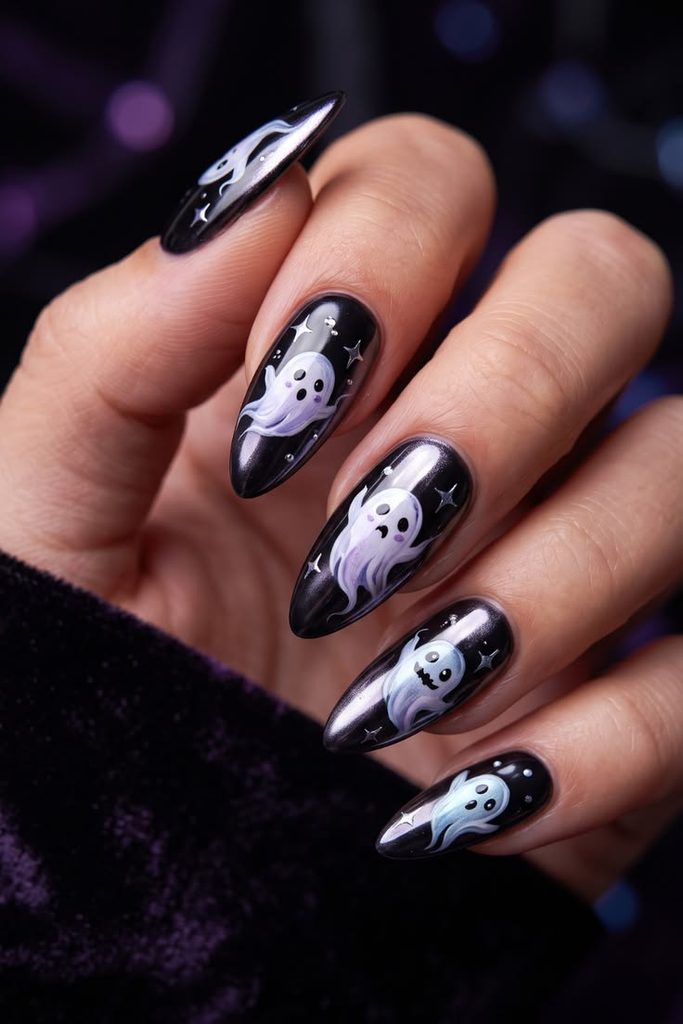
Apply a black gel or polish base and let it cure or dry fully before moving on. Buff on a chrome powder using a small applicator until the metallic finish appears across the whole nail. This method needs almost no brush skill, just a bit of patience while buffing evenly. The mirror-like result looks far more advanced than the effort it actually takes.
The base coat needs to be completely tack-free before you apply chrome powder, or the powder will clump instead of buffing to a smooth mirror finish this is the single most common mistake beginners make with this technique. Use a soft silicone applicator rather than a brush for the buffing step, since brush bristles tend to leave visible streak marks in the chrome finish. Seal the finished chrome with a non-wipe gel top coat if you have one, since regular top coats can sometimes dull the mirror effect slightly.
Save this for a modern take on Halloween nails.
20. Halloween Nail Art Without Any Tools
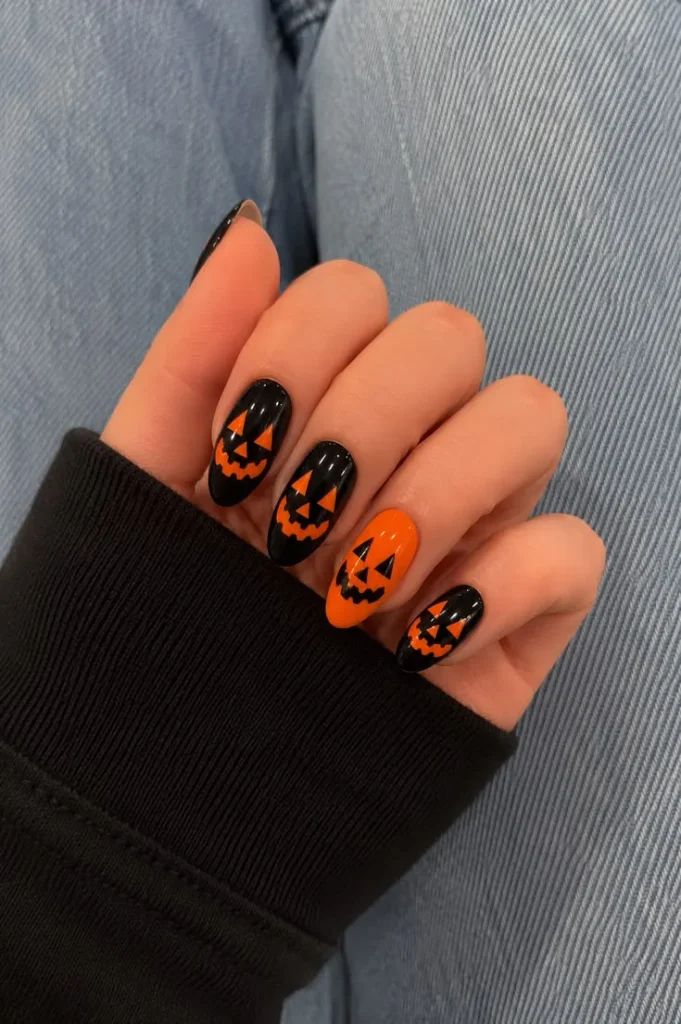
No nail art brushes at home? Dip a toothpick or bobby pin directly into wet polish and use it to create dots, swirls, or thin lines. It works nearly as well as a proper brush for small details, especially dots and simple outlines. Keep a tissue nearby to wipe the tip clean between colors so lines stay crisp.
A bobby pin gives slightly finer control than a toothpick for very small details like eyes or tiny dots, while a toothpick works better for slightly thicker lines like whiskers or cracks. Re-dip your tool in polish more often than you think you need to tools without a proper brush reservoir run out of polish faster and will start dragging instead of gliding. This is genuinely the best starting point on the whole list if you’ve never done any nail art before and aren’t ready to invest in a full tool kit yet.
Pin this if you’re starting completely from scratch.
21. Matte Black Nails for Halloween
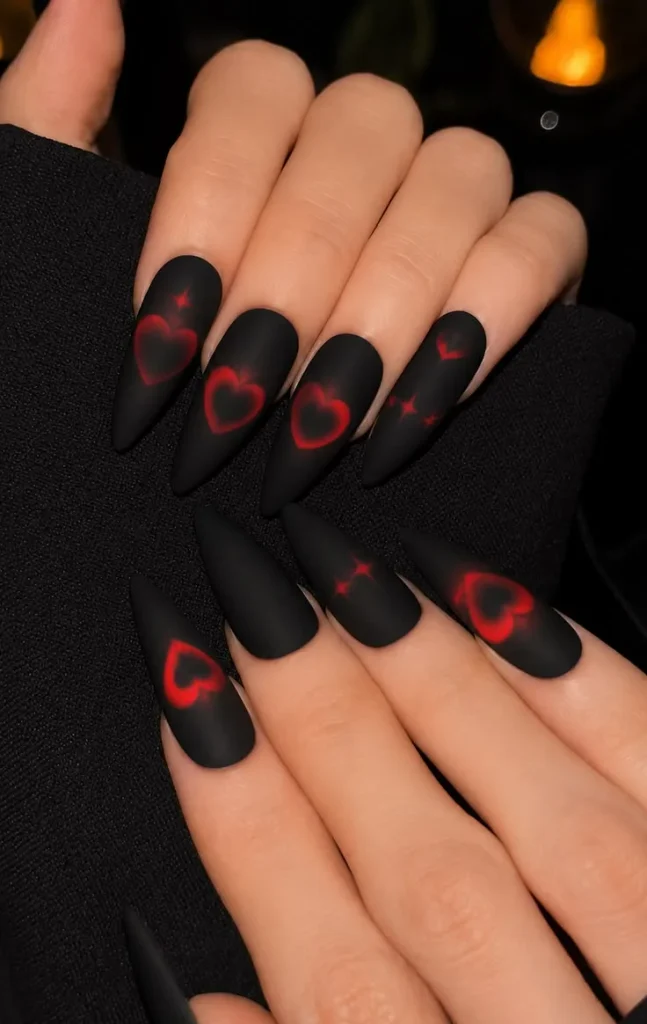
Apply two even coats of black polish across every nail, letting each one dry before the next. Seal with a matte top coat instead of a glossy one to change the whole texture of the finish. This single-step change instantly makes the look feel elegant and gothic with almost no design work involved. It’s also one of the easiest looks to keep looking fresh throughout the month.
Apply the matte top coat only once the black base is completely dry applying it too early can cause the two layers to drag into each other and create visible streaks. Matte top coats also tend to show fingerprints and touch marks more easily than glossy ones for the first hour or two after application, so try to avoid handling anything textured while it finishes setting. This is the single lowest-effort look on this entire list, making it a strong backup option if you’re short on time but still want your nails to feel intentionally Halloween-coded.
Save this for the lowest-effort option on this whole list.
22. Striped Halloween Nail Design
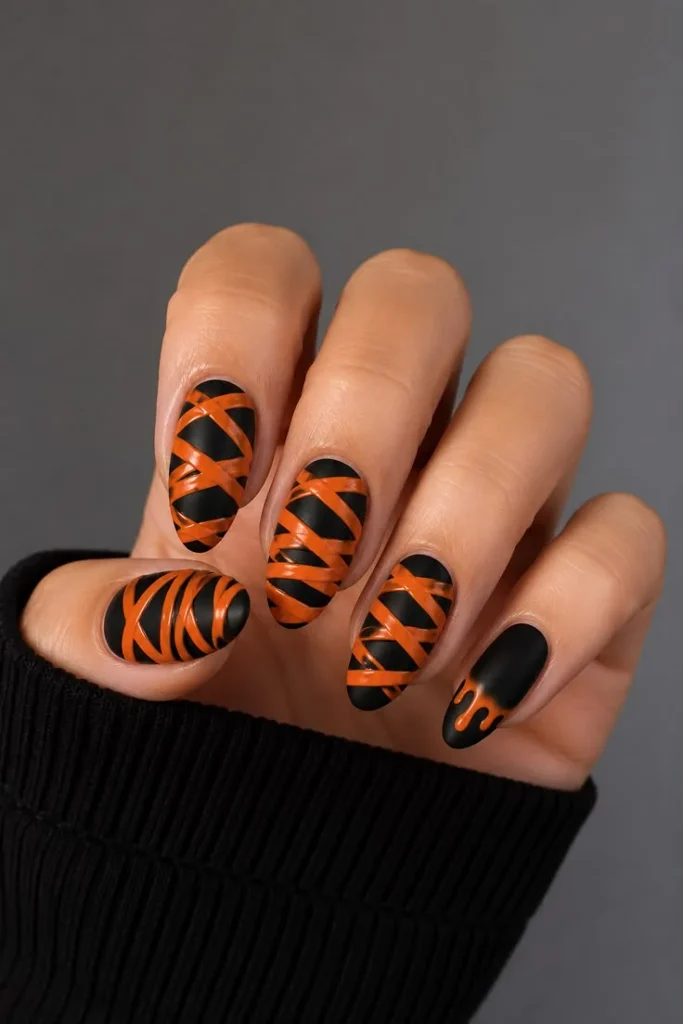
Apply striping tape across your dry base coat to mark out clean, even lines. Paint over the tape in alternating orange and black, then peel it away once the polish is dry. The tape does the precision work for you, so lines come out crisp even on a first attempt. Try switching the stripe direction on one nail for a bit of visual variety.
Press the tape down firmly along its full length before painting, since any lifted edges will let polish seep underneath and blur your lines. Peel the tape away at a low angle, pulling toward yourself rather than straight up, which reduces the risk of pulling up wet polish along with it. If you don’t have striping tape specifically, regular masking tape cut into thin strips works as a reasonable substitute, though it won’t give quite as crisp an edge as purpose-made nail tape.
Pin this for crisp lines without any freehand skill.
23. Zombie-Inspired Nail Art
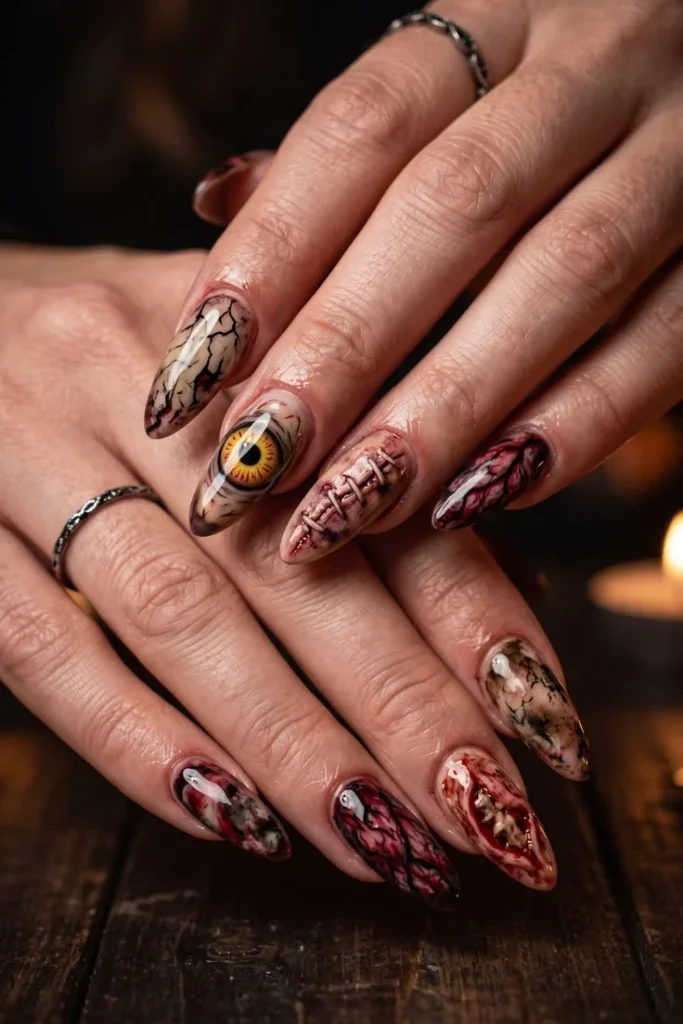
Start with a pale green or grey base coat and let it dry completely. Paint a few thin black lines across one nail to look like cracks, then add short straight stitch marks nearby. It’s a fresh alternative if pumpkins and ghosts feel a little overdone this year. The pale, eerie base color alone does a lot of the visual work.
Choose a slightly dusty, desaturated green rather than a bright mint for the base a muted tone reads as “eerie” much more convincingly than a cheerful pastel would. For the stitch marks, short parallel lines crossed by one perpendicular line (like a simple ladder rung) reads clearly as stitching without needing any real embroidery detail. This design pairs particularly well with a matte finish, which adds to the pale, lifeless quality that makes the zombie theme work.
25+ Fall Outfit Ideas Using What You Already Own
Save this for a different kind of spooky.
24. Mummy Wrap Nail Design
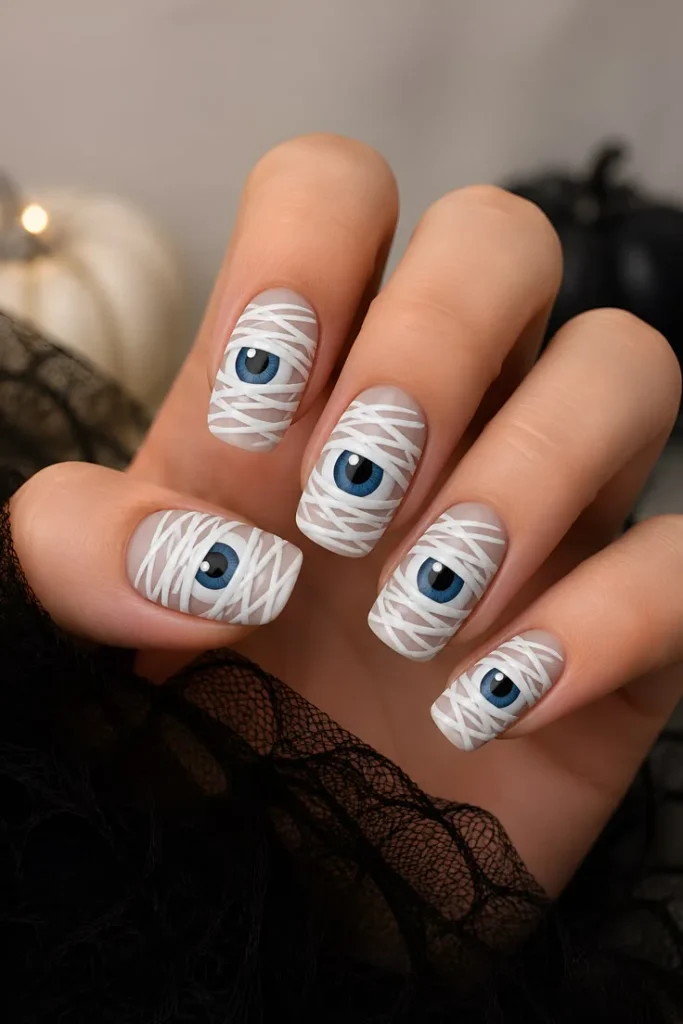
Start with a nude or beige base coat as your foundation. Paint overlapping white lines across the nail to resemble loose bandage wraps, leaving small gaps between them. Finish with two tiny black dot eyes peeking through on just one nail for a playful touch. It’s more textured than most looks on this list, but still forgiving of uneven lines.
Vary the angle of each “bandage” line slightly rather than keeping them all parallel real wrapped bandages overlap at slightly different angles, and that irregularity is what sells the effect. Leave gaps of different sizes between the lines too, since perfectly even spacing can end up looking more like a barcode than a mummy wrap. This is a good design to practice patience with, since it takes a few more brushstrokes than most others on this list, but the payoff is one of the more distinctive, less common looks in this guide.
Pin this for one of the more textured looks on the list.
25. Polka Dot Halloween Nails
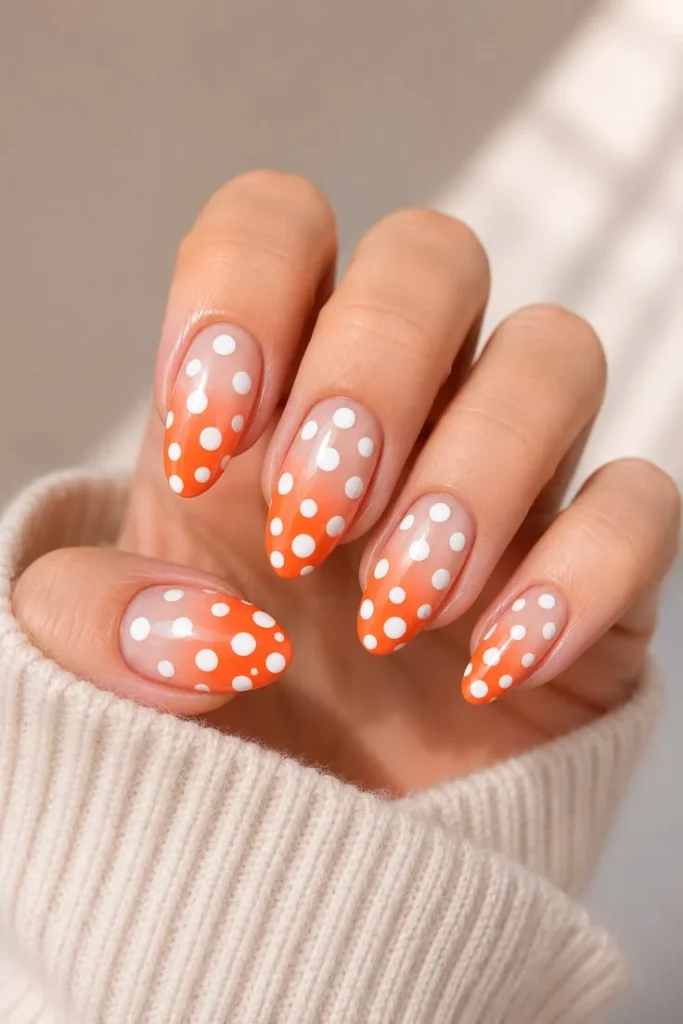
Apply a solid black base across all nails and let it dry. Scatter white or orange dots randomly using a dotting tool, mixing up the sizes for a more natural, less mechanical look. It takes only a few minutes and rarely looks messy, even for total beginners. This is a great option if you’re short on time before a party.
Use two or three different-sized dotting tools (or a dotting tool plus a toothpick) to genuinely vary the dot sizes, since using just one size tends to look repetitive rather than organic. Clustering a few dots closer together in one area of the nail, with more open space elsewhere, mimics how scattered patterns naturally occur and looks less like a uniform grid. This is consistently one of the fastest designs in this entire guide, making it the go-to option when you’re truly pressed for time.
Save this for one of the fastest looks in this guide.
26. Glow-in-the-Dark Halloween Nails
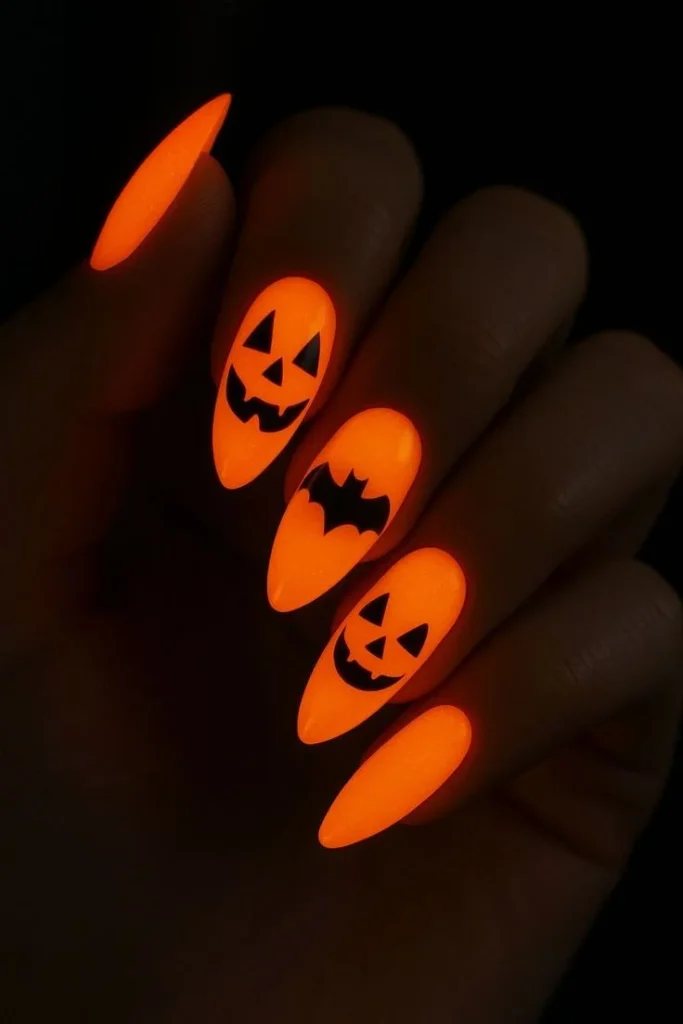
Paint your base color of choice as usual, keeping the color light enough to let the glow effect show through. Seal everything with a glow-in-the-dark top coat once the base is fully dry. Your nails will light up under blacklight, which makes this a fun pick specifically for parties or trick-or-treating after dark. It’s a small detail people always notice.
Lighter base colors (white, pale yellow, or soft green) let the glow-in-the-dark top coat show through far more visibly than dark bases like black or navy, so choose your base shade with that in mind. These top coats typically need a few seconds of direct light exposure to “charge” before they’ll glow, so a quick moment near a lamp or phone flashlight right before heading out will refresh the effect. This design works especially well layered over one of the simpler designs on this list, like the dot pattern or French tip, rather than as a totally separate look.
Pin this if you’re headed to a Halloween party this year.
27. Jack-o’-Lantern Face Nail Design
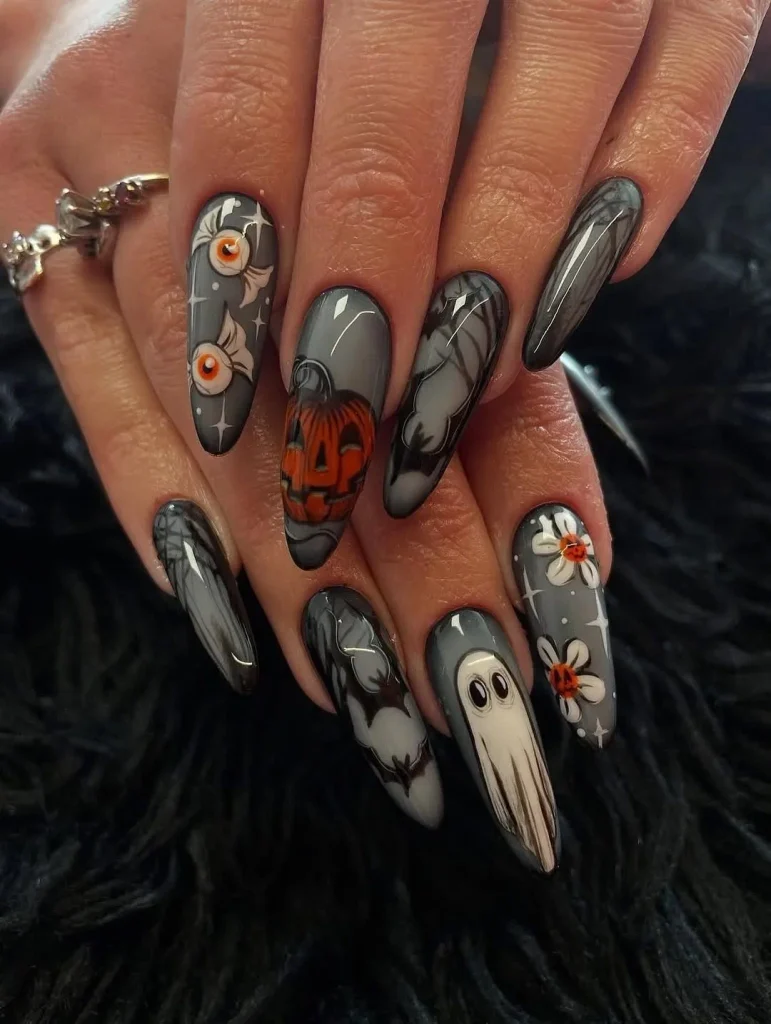
Start with a solid orange base on one accent nail and let it dry fully. Paint two black triangle eyes and a triangle nose in the center of the nail. Finish with a jagged smile line underneath for the classic carved-pumpkin effect. It’s one of the most recognizable Halloween symbols, shrunk down to fit on a single nail.
Keep the triangle eyes slightly smaller than feels natural at first nail-sized canvases make details look larger than expected once the polish dries and the shapes settle. For the jagged smile, three or four zigzag points is usually enough; adding too many small teeth tends to blur together into an illegible line rather than reading as a smile. This design pairs perfectly with the pumpkin design earlier in this list if you want a matching but not identical Halloween theme across your hands.
Save this for the most iconic Halloween symbol, mini-sized.
28. Purple to Black Ombre Nails
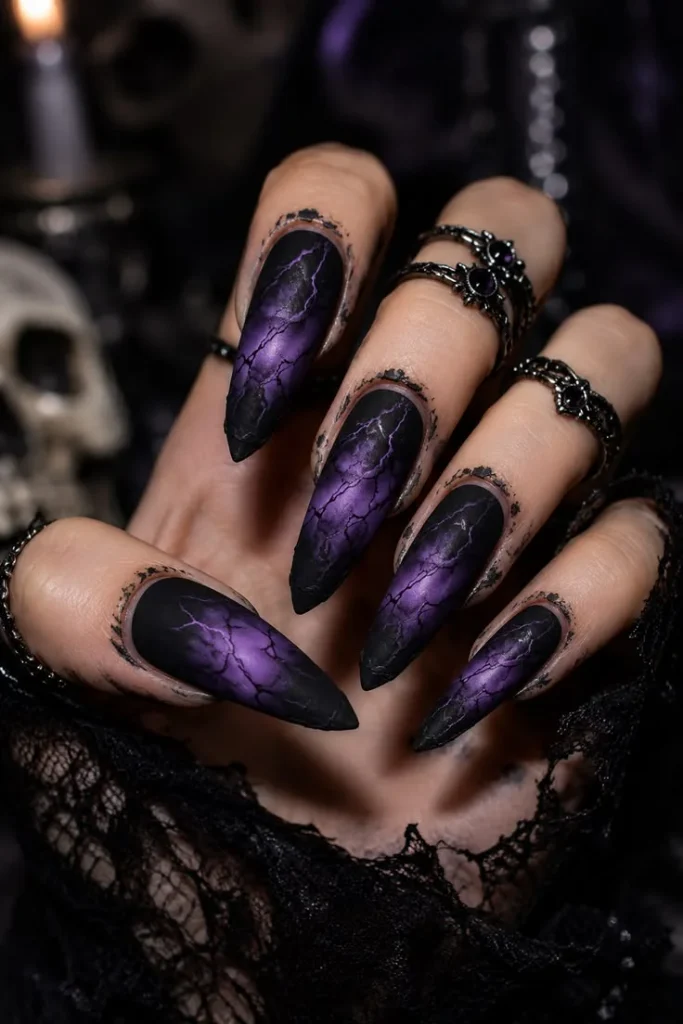
Use the same sponge-blending technique as the orange ombre look earlier in this list. Swap in a deep purple base fading into black tips instead of orange. Blend gently where the two shades meet, then seal with a glossy top coat once dry. It’s a moody alternative if the usual orange-and-black combo feels too obvious this year.
Choose a purple with a slight blue undertone rather than a red-leaning purple, since blue-purples tend to transition into black more smoothly and look less muddy at the blend point. As with the orange ombre, working while both colors are still workable on the sponge (rather than letting them dry between dabs) is the key to a smooth gradient rather than a patchy one. This color combination photographs especially well in low, warm lighting, making it a strong choice for evening Halloween events specifically.
Pin this for a different color story this Halloween.
29. Halloween Emoji Nail Art
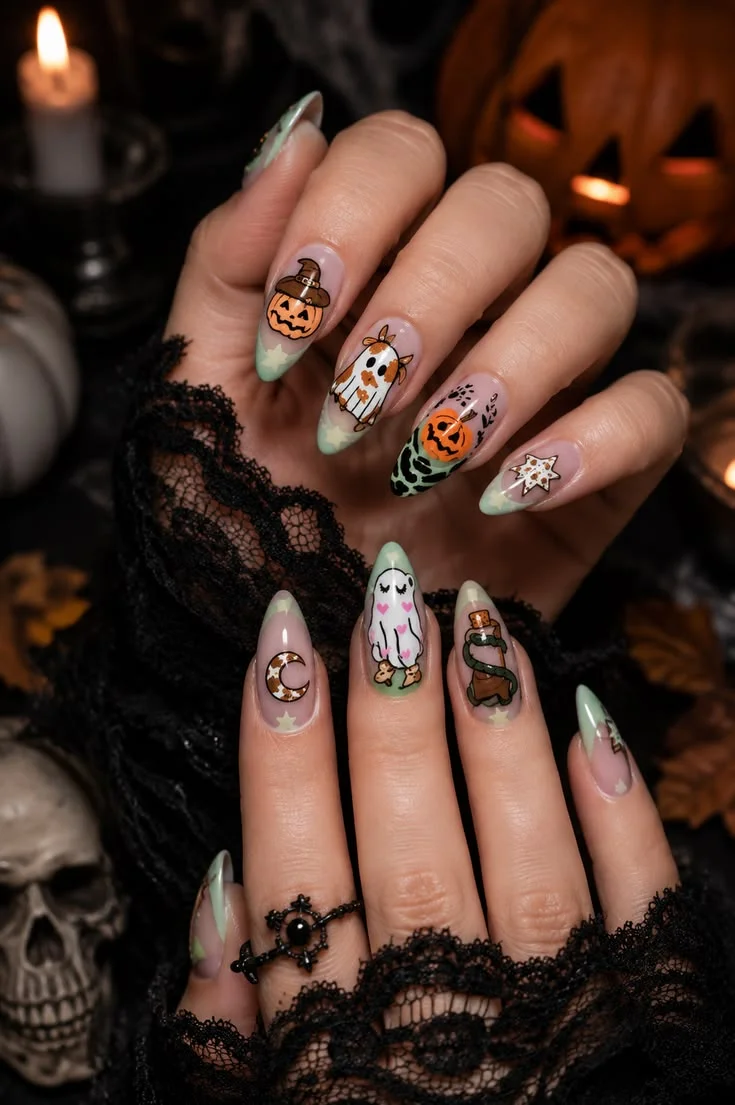
On a white or cream base, paint a small round ghost face on one nail using simple dot eyes and a wavy mouth. Add a tiny orange pumpkin emoji face on another nail for contrast. This playful, modern look feels different from the usual hand-painted Halloween art on this list. It’s especially fun if you’re already into emoji-inspired nail trends.
Keep the emoji faces simple and rounded rather than trying to add too much detail the appeal of emoji-style art is its flat, minimal quality, and overcomplicating the features actually works against that style. A slightly oversized dotting tool works well for the round emoji eyes, since emoji faces typically have larger, simpler eyes than realistic illustrations. This design is a good option for anyone wanting Halloween nails that feel more current and social-media-inspired rather than traditionally spooky.
Save this for something cute rather than spooky.
30. Marble Nail Design in Black and Orange
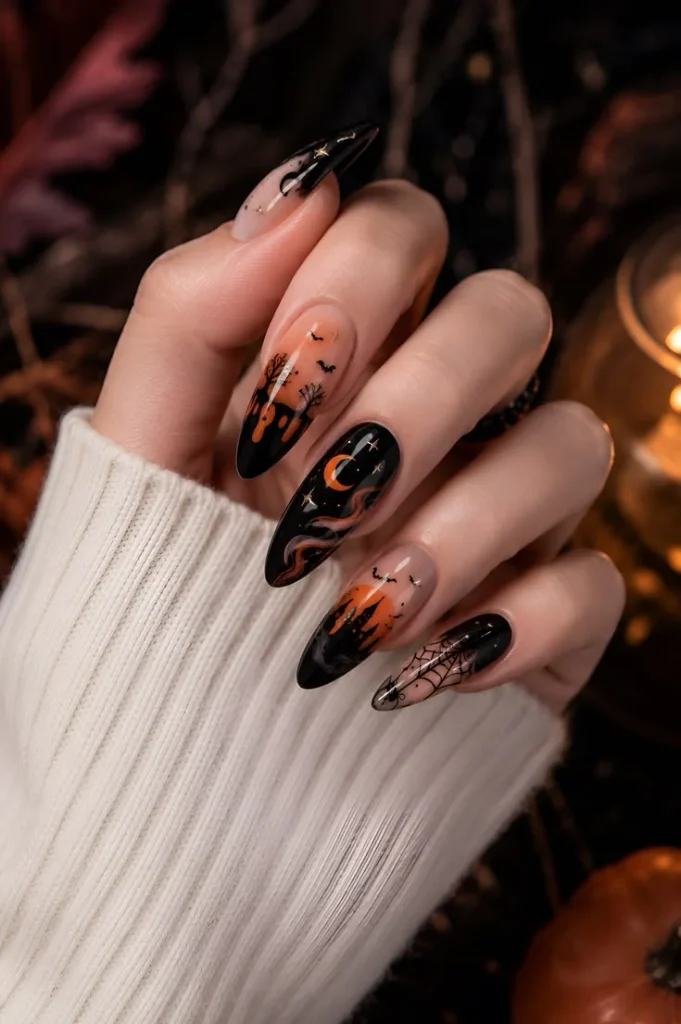
Drop black and orange polish into a bowl of room-temperature water, letting each drop spread slightly before adding the next. Swirl the colors gently with a toothpick to create a marbled pattern on the surface. Dip your nail into the pattern at an angle to pick it up, then lift straight out. Every result looks slightly different, which is part of the appeal of this technique.
Tape off the skin around your nails with painter’s tape or a peel-off latex barrier before starting, since water marbling is notoriously messy and gets polish on your fingers otherwise. Room-temperature water is important here water that’s too cold or warm can affect how the polish spreads and thins on the surface. If your first attempt at a design pattern doesn’t look right once it hits the water, you can usually scoop it out with a toothpick and start the swirl over without wasting much polish.
Pin this to close out your Halloween nail board.
Final Thoughts
That’s 30+ easy Halloween nail ideas for beginners you can recreate at home, from quick accent-nail designs to full hand looks that still take under half an hour. Pick whichever one matches your mood this week, save the ones you want to try later, and check back closer to Halloween for more seasonal nail inspiration.
Leave a Comment